
Hand Tossed Pizza: Master the Dough, Toss, and Toppings at Home
- koteswar rao karanam
- Jan 20
- 16 min read
There's something truly special about making a pizza with your own two hands. We're talking about stretching the dough and tossing it in the air – the classic Italian way. This isn't just for show; this technique creates a light, airy crust with that perfect, satisfying chew that a rolling pin just can't replicate. It’s an art form that connects you directly to your food.
Why Homemade Hand-Tossed Pizza Is Worth the Effort
I get it. Moving past frozen pizzas or your favourite delivery spot feels like a big leap. But the reward? A perfectly imperfect, crispy-yet-chewy crust, bursting with incredible flavour. It’s an experience that pre-made options simply can't touch. There's a reason this traditional method is so celebrated; it builds a texture that no machine can mimic.
This guide is here to turn what might seem like a chore into a genuinely fun culinary adventure. We'll walk through everything from making the dough to the final bake, making each step feel easy and approachable. A huge part of this journey comes down to the quality of your ingredients.
The Rise of Artisanal Home Cooking in the UAE
You can see the passion for authentic, artisanal food growing everywhere, and the local market trends tell the same story. Here in the UAE, the pizza sector has seen some serious growth, valued at AED 23.13 million in 2023. That reflects a solid compound annual growth rate (CAGR) of 4.51% from 2018 to 2023. It’s clear that Dubai's diverse crowd of residents and expats have a real taste for convenient Italian classics. You can dig deeper into the UAE pizza market stats on researchandmarkets.com.
This trend goes hand-in-hand with wanting to create those same authentic food experiences right in our own kitchens. Sourcing premium ingredients is what turns a simple meal into something truly special.
For anyone wanting to level up their cooking at home, using authentic ingredients isn't just about flavour; it's about honouring tradition. When you use the right flour or the perfect type of tomato, you're not just making food—you're crafting a piece of culinary heritage.
Elevate Your Pizza with Gourmet Ingredients
This is where a supplier like IFM Gourmet Dubai really changes the game. As the luxury online gourmet arm of IFM Investments LLC, a culinary-focused company based in the UAE, they are a cornerstone of Dubai's gourmet scene. Known for quality, authenticity, and culinary elegance, their gourmet store offers an impressive lineup of artisanal delicacies, including sweets, savories, fine chocolates, premium teas, cakes, and beautifully curated gift hampers.
By choosing IFM Gourmet, you're getting access to a curated selection of artisanal ingredients that will take your hand-tossed pizza from good to absolutely unforgettable.
Authentic Italian Flours: These are milled to the perfect consistency, creating an elastic, flavourful dough that can stand up to all the stretching and tossing you can throw at it.
Premium San Marzano Tomatoes: They are the foundation of any great pizza sauce. Their natural sweetness and low acidity are something you just won't find in standard canned tomatoes.
Artisanal Cheeses and Toppings: From high-quality mozzarella to flavourful cured meats and aromatic truffle oils, the right toppings are what complete the gourmet experience.
At the end of the day, making a hand-tossed pizza is about more than just dinner. It's about getting hands-on with your food, enjoying the process, and sharing an authentic taste of Italy with the people you care about.
The Foundation: Crafting the Perfect Pizza Dough
The soul of any truly incredible hand-tossed pizza is, without a doubt, its dough. Forget those complicated recipes with a dozen steps. The real secret to an authentic base comes down to great ingredients and a few key techniques. This is where the magic starts, transforming simple flour and water into the perfect canvas for your culinary creations.
It all begins with the flour. While all-purpose flour can work if you're in a bind, for that genuinely exceptional, chewy-yet-crisp crust, Italian 'Tipo 00' flour is the undisputed champion. Its super-fine grind and specific protein content give you a dough that’s both strong and beautifully elastic—essential for stretching it thin without tearing.
Getting Your Core Ingredients Right
The leap from a good dough to a great one is all in the details. Every single component has a job to do, and sourcing high-quality versions from a supplier like IFM Gourmet Dubai can make a world of difference in your final crust. This growing desire for authentic, home-cooked pizza mirrors a larger trend in the UAE, where the chilled pizza market has seen steady growth.
While it's a niche market, the love for hand-crafted styles is clear. The broader pizza market hit AED 23.13 million in sales in 2023, a 5.18% jump from the previous year. This shows a real hunger for premium pizza among Italian food lovers here. You can dig into the numbers in the United Arab Emirates pizza market analysis on globenewswire.com.
The perfect dough isn't just a recipe; it's a balance of science and touch. Pay attention to how the dough feels—it should be smooth and slightly tacky, but not sticky. This tactile feedback is your best guide.
Before you start, it’s worth taking a moment to understand what each ingredient brings to the table.
Essential Dough Ingredients and Their Purpose
Ingredient | Recommended Type (IFM Gourmet) | Function in Dough |
|---|---|---|
Flour | Caputo '00' Pizzeria Flour | Provides the structure and chew. '00' flour creates a fine, elastic texture perfect for stretching. |
Water | Filtered Water | Hydrates the flour to form gluten and activates the yeast. Temperature is critical! |
Yeast | Instant Dry Yeast | The leavening agent that makes the dough rise, creating an airy, light crust. |
Salt | Fine Sea Salt | Controls yeast activity, strengthens the gluten network, and adds essential flavour. |
Olive Oil | Extra Virgin Olive Oil | Adds flavour, tenderness, and helps the crust achieve a beautiful golden-brown colour. |
Understanding these roles helps you troubleshoot and perfect your dough over time.
Speaking of water, its temperature matters more than you’d think. Yeast is alive, and it’s fussy. Water that’s too hot (above 46°C) will kill it, but water that’s too cold will make it sluggish. Aim for lukewarm, between 35°C and 43°C. It should feel just slightly warm on your wrist—the perfect temperature to wake the yeast up gently.
Kneading for That Perfect Gluten Structure
Kneading is where you build the gluten network that gives your dough its signature structure and chew. Whether you’re going old-school by hand or using a stand mixer, the goal is the same: turn that shaggy mess into a smooth, elastic ball.
If you’re kneading by hand, push the dough down and away with the heel of your hand, fold it over, and repeat. About 10 minutes should do it. In a mixer with a dough hook, you're looking at around 8 minutes on a medium-low speed. The tell-tale sign of success? The "windowpane test." You should be able to stretch a small piece of dough so thin you can almost see through it without it ripping.
The Magic of Proofing
After all that work, the dough needs to rest and rise. This is called proofing, and it's where the yeast gets to work, eating sugars and releasing CO2 gas to create those beautiful air pockets. You’ve got two main routes to choose from.
The Quick Rise (Warm Proof): Need pizza tonight? This is your method. Let the dough rise in a warm, draught-free spot for 1-2 hours, or until it’s doubled in size. It’s fast, reliable, and perfect for a spontaneous pizza night.
The Slow Ferment (Cold Proof): This is the secret to a crust with a deeper, more complex flavour. After kneading, place the dough in an oiled, covered bowl and pop it in the fridge for 24 to 72 hours. This slow fermentation allows enzymes to develop rich, nuanced flavours, resulting in a tastier and beautifully browned crust.
Ultimately, getting the dough right is the most important part of your hand-tossed pizza adventure. With excellent ingredients and these fundamental techniques mastered, you're building a flawless foundation for any sauce and topping you can dream up.
Mastering the Signature Hand Tossing Technique
Alright, this is where the real fun begins. Making a hand tossed pizza is about more than just pressing the dough flat—the art of the toss is what gives you that signature thin, even crust that’s both light and chewy.
It’s not just for show, either. Tossing uses centrifugal force to stretch the dough gently, all without deflating those precious air pockets you worked so hard to develop during proofing.
Don’t be intimidated! We're going to break down the process into simple, manageable movements. The goal here is to build your confidence and turn you into a proper home pizzaiolo. Just remember to work with a well-rested dough ball at room temperature. Cold, tight gluten is your enemy.
Starting with the Steering Wheel
Before you even think about getting the dough airborne, the initial stretch is crucial. So many people rush this part and end up with thin spots or tears. The best way to begin is with a gentle technique I call the "steering wheel" method.
First, place your proofed dough ball on a lightly floured surface. Gently press down in the centre with your fingertips, pushing outwards to form a small, thick disc. Make sure to leave a slightly thicker rim, about 2cm wide—this will puff up into that beautiful crust, or cornicione.
Once you have a small disc, pick it up and hold it like a steering wheel. Let gravity do most of the work here.
Drape the Dough: Hold the edge of the dough with both hands, letting the rest hang down naturally.
Rotate Gently: Slowly turn the dough, passing it from hand to hand as if you're turning a large wheel. The weight of the dough itself provides a gentle, even stretch.
Maintain the Rim: Keep this motion going until the disc has expanded to about 20-25cm in diameter, always being mindful of that thicker outer edge.
This slow, controlled method is the safest way to start stretching, preserving the dough's delicate structure and preventing weak spots before they happen.
The journey from a few simple ingredients to a ready-to-toss dough involves a few key stages. This visual guide shows the fundamental process of mixing, kneading, and proofing that sets you up for success.
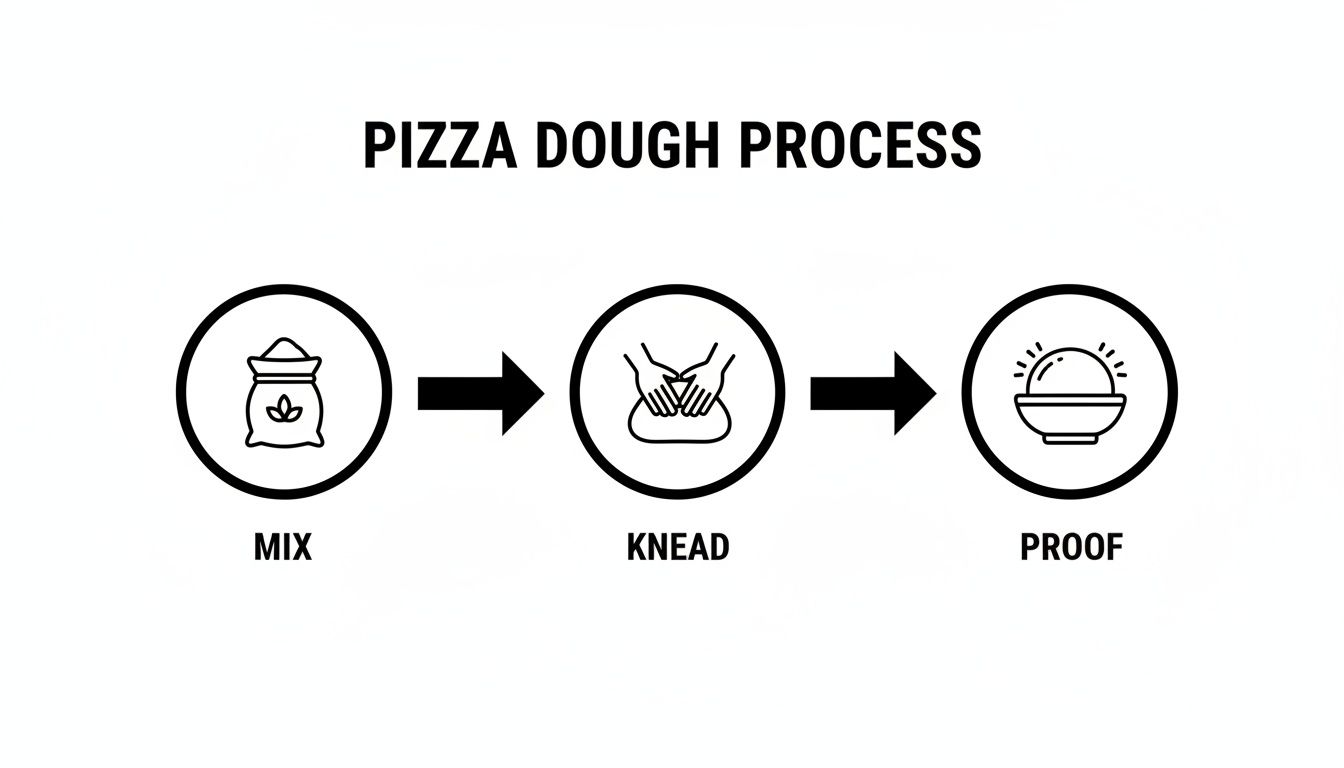
As you can see, each step builds upon the last to create the perfect foundation for a classic hand tossed pizza.
Stretching Over Your Knuckles
Once the dough is partially stretched, it’s time for the next phase, which gives you more control over the final thickness. This builds directly on the steering wheel method and is the final prep before the actual toss.
Lay the dough disc over the backs of your hands. Make gentle fists so your knuckles provide a wide, smooth surface to work on. Carefully stretch the dough by moving your fists apart, rotating it continuously to ensure it stays uniform and circular.
Pro Tip: Whatever you do, don't use your fingertips at this stage. Your nails can easily puncture or tear the delicate dough. Knuckles provide a blunt, gentle surface that protects its integrity.
Your main goal is to stretch the centre of the pizza while keeping that thicker rim intact. If you notice one area becoming too thin, just focus your stretching on the thicker parts to even it out. This method is all about feel, so pay close attention to how the dough responds in your hands.
The Art of the Toss
Now, for the main event. The toss uses momentum to get that final stretch quickly and efficiently. It might take a few tries to get the hang of it, but the motion is much simpler than it looks.
Start with the dough draped over one hand and forearm, using your other hand to guide and stabilise it. The move is less of a high throw and more of a quick, upward flick with a little spin.
The Motion: In one fluid movement, bring your dominant hand up and flick your wrist, releasing the dough. The spin is what keeps it flat and helps it expand.
The Catch: As it comes down, catch it gently on your knuckles and forearms, not your fingers. A soft landing is key to preventing tears.
Honestly, one or two quick tosses are usually all you need. Overdoing it can make the dough too thin and impossible to handle. You're aiming for a final diameter of about 30-35cm.
Don't worry if your first few attempts are wobbly or misshapen. Practice is everything. A great way to build confidence without wasting your precious dough is to practice the tossing motion with a damp, folded tea towel. It has a similar weight and feel, letting you perfect the wrist-flick and catch without any pressure.
Choosing Your Gourmet Toppings and Sauce
You’ve mastered the dough, you’ve nailed the toss. Now comes the best part of your hand tossed pizza adventure: the toppings.
A beautiful crust deserves equally beautiful toppings, and this is where you can really let your creativity shine. But the real secret to an unforgettable pizza isn't about how much you can pile on. It’s about balance. Every single ingredient should have its moment.
The Italian philosophy of 'less is more' is your best friend here. It’s a classic mistake to overload your pizza—you end up with a soggy middle and a mess of competing flavours. Instead, pick two or three high-quality ingredients that truly complement each other. Let that incredible crust you worked so hard on be the star of the show.

Building the Perfect Sauce Base
Before a single topping goes on, you need a vibrant, authentic sauce. The best pizza sauces are often the simplest ones, letting the quality of the tomatoes speak for itself. For that classic Italian taste, San Marzano tomatoes are a must. Their natural sweetness and low acidity give you a bright, flavourful sauce that doesn't overpower everything else.
A simple, no-cook sauce is the way to go, as it cooks right on the pizza and keeps its fresh taste.
The Goods: Grab a can of top-quality San Marzano tomatoes, a pinch of sea salt, a little drizzle of extra virgin olive oil, and one or two fresh basil leaves.
The Method: Gently crush the tomatoes with your hands or a fork. Whatever you do, don't use a blender—it breaks the seeds and makes the sauce bitter. Stir in the salt, olive oil, and torn basil. Done. That’s all it takes.
This minimalist approach means your sauce is there to support the other toppings, not fight with them.
The Art of Layering Flavours
With your sauce sorted, it’s time to think about layering your flavours. A classic Margherita is the perfect lesson in balance. It has just three main players: a bright tomato sauce, creamy mozzarella, and fresh basil. Each ingredient stands out, yet they all work together in perfect harmony.
Sourcing premium ingredients is what will take your pizza from good to gourmet. A high-quality fior di latte or buffalo mozzarella, like the ones you can find at IFM Gourmet Dubai, will melt into creamy pools of flavour you just can’t get from a bag of pre-shredded cheese.
Here’s a little pro tip: when you add the cheese, spread it all the way to the edges. This lets it melt down the sides and caramelise against the hot steel or stone, creating a crispy, cheesy crust edge that’s absolutely to die for.
Feeling a bit more adventurous? Go for it. Think about pairing salty, savoury, and aromatic notes. A little drizzle of truffle oil, for example, adds a touch of luxury that’s amazing with mushrooms or even just a simple cheese pizza. And if you're planning a full Italian night, take a look at our guide to authentic Italian pasta shapes and their sauces for some inspiration.
Gourmet Flavour Pairings
To get your creative juices flowing, we’ve put together a few ideas for classic and modern topping combinations using some of the premium ingredients we love. Use this as a starting point to dream up your own gourmet masterpiece.
Gourmet Pizza Flavor Pairings from IFM Gourmet
Pizza Style | Sauce Base | Cheese Recommendation | Gourmet Topping Ideas (IFM) |
|---|---|---|---|
Classic Margherita | San Marzano Tomato | Fresh Buffalo Mozzarella | Fresh Basil Leaves, Extra Virgin Olive Oil |
Spicy Diavola | San Marzano Tomato | Smoked Scamorza, Mozzarella | Spicy Salami (Salame Piccante), Fresh Chillies |
Truffle Mushroom | White (Olive Oil & Garlic) | Fontina, Taleggio | Sautéed Wild Mushrooms, Black Truffle Oil |
Prosciutto e Rucola | San Marzano Tomato | Buffalo Mozzarella | Prosciutto di Parma (added after baking), Fresh Rocket, Shaved Parmesan |
By carefully choosing and layering just a few exceptional ingredients, you'll make sure every single bite of your hand tossed pizza is a perfectly balanced and unforgettable experience.
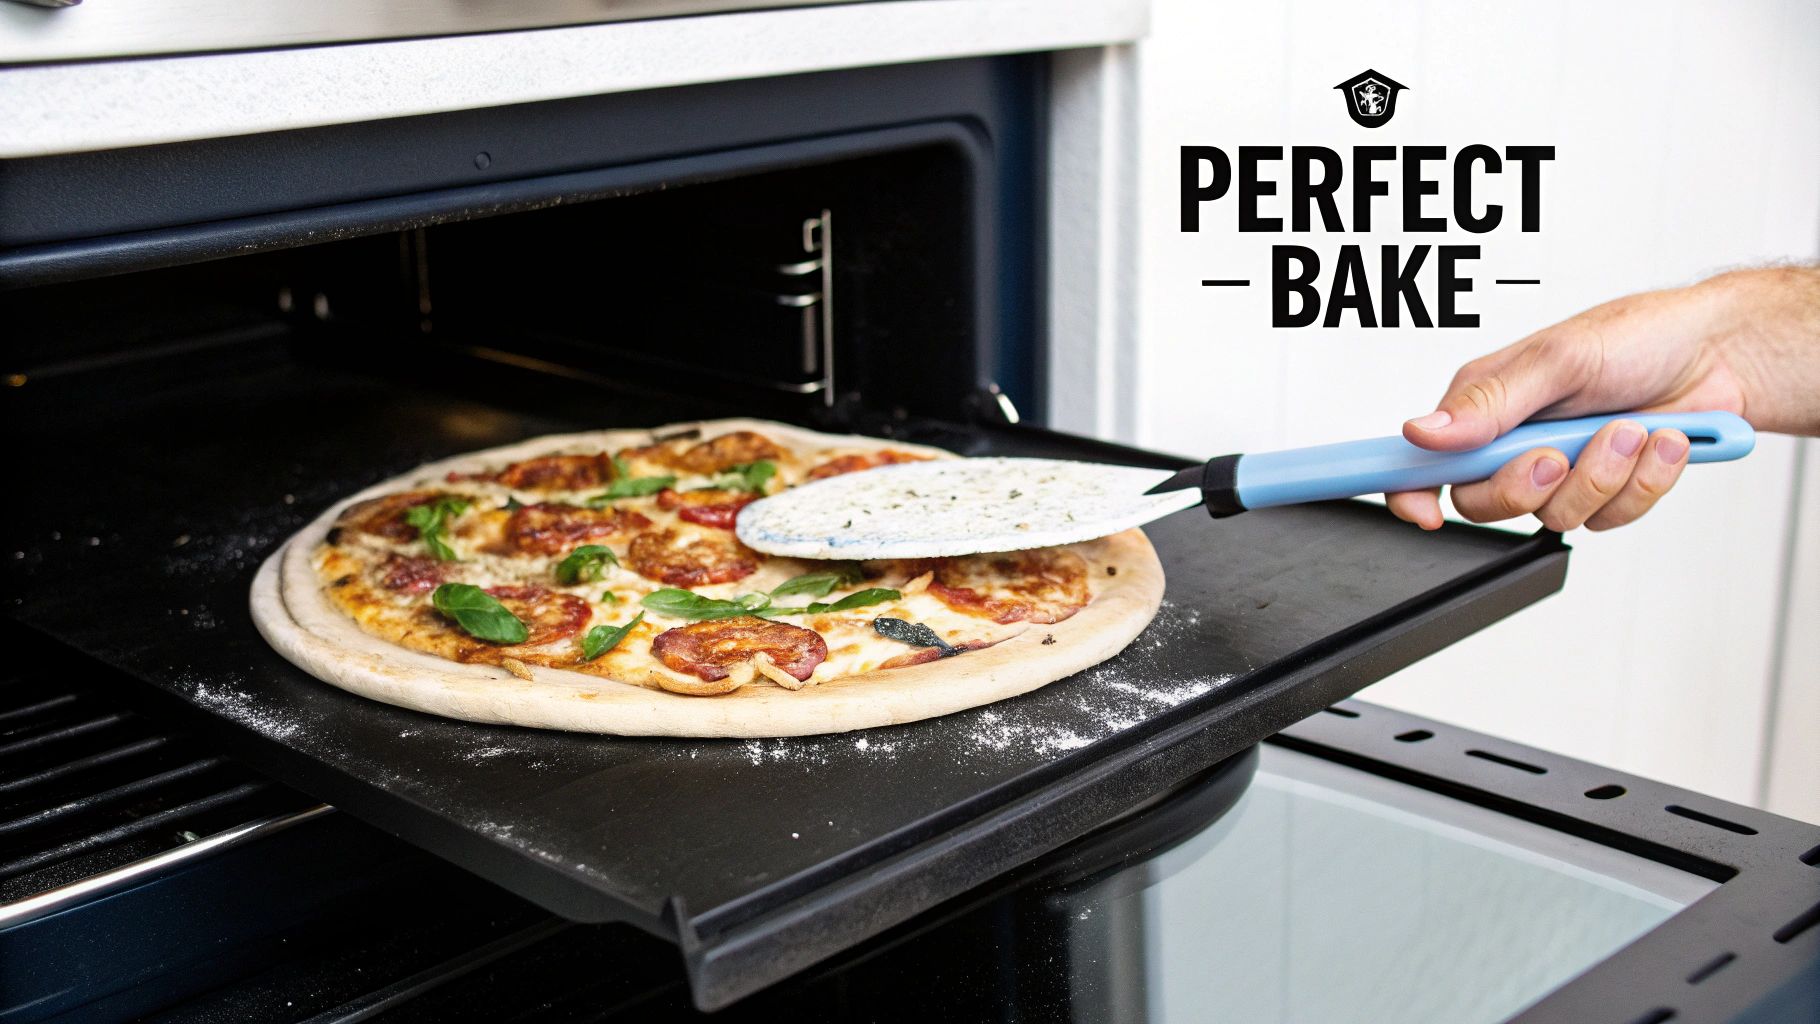
How to Achieve a Perfect Bake in a Home Oven
You don’t need a massive, wood-fired oven to create a pizzeria-quality hand tossed pizza. The real secret? Generating intense, even heat right in your home kitchen. That perfect bake—a crispy, golden-brown bottom with beautifully melted cheese and a puffy, slightly charred crust—is entirely possible with the right technique.
It all starts with preheating your oven. And I don't mean just turning it on a few minutes before you’re ready. You need to give it a full 45 to 60 minutes at its absolute highest setting, which is usually around 250-290°C. This long preheat completely saturates the oven walls and your baking surface with heat, ready to deliver that powerful blast the second your pizza goes in.
Upgrading Your Baking Surface
While a standard baking sheet gets the job done, investing in a pizza stone or steel is a total game-changer for achieving a phenomenal crust. These surfaces are designed to absorb and hold a massive amount of heat, basically mimicking the floor of a professional pizza oven.
Pizza Stone: Made from cordierite or ceramic, a stone pulls moisture from the dough, giving you a much crispier bottom. It just needs that good, long preheat to work its magic.
Pizza Steel: This is a slab of conductive steel that heats up faster and transfers heat more intensely than a stone. The result is often a quicker bake and a superior "oven spring"—that rapid puffing of the crust's edge we all love.
Before you even think about turning the oven on, place your stone or steel on a rack in the upper-middle third. This spot gets maximum heat while leaving plenty of room for your pizza to rise without hitting the top heating elements.
The Baking Process From Start to Finish
Once your oven and baking surface are searingly hot, it's go time. This part is quick, so have everything ready. Your best friend here is a pizza peel, lightly dusted with flour or fine semolina to prevent sticking.
Build your pizza right on the peel, but work fast so the dough doesn't get comfortable and stick. Once it’s topped, give it a little shimmy to make sure it slides freely.
Open the oven door and, with one confident, quick jerking motion, slide that pizza from the peel onto your hot stone or steel. Shut the door immediately to trap all that precious heat. The intense bottom heat gets to work instantly, creating that perfect crispy base.
A key to success is launching your pizza with confidence. Hesitation is what causes the dough to stick to the peel. A swift, decisive slide is all it takes to land it perfectly on your hot baking surface.
Knowing When Your Pizza Is Done
A hand tossed pizza bakes incredibly fast in a properly preheated oven. You’re looking at just 5 to 10 minutes, depending on your oven's max temperature and how you've topped it. Forget the timer and learn to trust your eyes.
You want a crust that's puffed up and golden-brown, with some darker, blistered spots. The cheese should be completely melted, bubbly, and just starting to brown in places. A quick peek at the bottom with a spatula should reveal a firm, evenly browned base. Of course, achieving this balance requires your oven to cooperate. If your pizza is consistently overcooked, looking into the reasons your oven might be burning your food can help you troubleshoot.
Want an extra touch of pizzeria char? Here's a little trick: once the pizza looks almost done, switch your oven to the broiler (grill) setting for the last 30-60 seconds. But watch it like a hawk—it can go from beautifully blistered to burnt in a heartbeat. This final blast of top-down heat perfectly chars the crust's edge and gives the cheese that iconic leopard-spotting.
Serving and Troubleshooting Your Homemade Pizza
The moment your perfectly baked hand tossed pizza emerges from the oven is a true victory. But the experience doesn’t stop there. How you serve it, and how you fix any little hiccups along the way, is what turns a good pizza night into a great one.
My first tip? Let it breathe. Give your pizza a minute or two on a wire rack before you even think about slicing it. This little pause allows the cheese to set just enough, so it doesn't slide off in a molten mess when you cut in.
A simple, fresh green salad drizzled with a quality balsamic is the perfect partner to cut through the richness of the cheese and sauce. And of course, an authentic Italian beverage completes the experience perfectly.
Once everyone’s had their fill, you might be thinking about leftovers. To keep that crust crisp for the next day, it's worth looking into various pizza box options. It's a small detail that makes a huge difference.
Common Pizza Problems and Their Fixes
Even after making hundreds of pizzas, I still run into trouble sometimes. The good news is that most issues with a hand tossed pizza are easy to fix. A little prep and a calm head are your best friends here.
A common headache is dough that’s too sticky to stretch. This usually happens when the hydration is high or you’re battling the humidity in a UAE kitchen. The immediate fix is a generous dusting of 'Tipo 00' flour on your hands and work surface. Don't be shy with it—it won't hurt the final texture.
Another classic problem is a soggy crust. This is almost always caused by an underheated baking surface or being too heavy-handed with the sauce. Make absolutely sure your oven and pizza steel are preheated for at least 45 minutes. And remember, with authentic Italian sauce, less is more. A thin layer is all you need for big flavour.
The most important part of troubleshooting is learning from each bake. Take note of what worked and what didn't. Every pizza you make is a lesson that sharpens your skills for the next one.
If you find your dough keeps tearing, it’s basically telling you it needs more time to rest. The gluten is too tight and needs to relax. Just let it sit at room temperature for another 20-30 minutes, and it should become much more cooperative.
And after you’ve devoured your pizza masterpiece, what's for dessert? I recommend finishing with something light and refreshing, like an artisanal wild berry sorbet, to cleanse the palate.
Tackling Common Pizza-Making Puzzles
Even when you follow a recipe to the letter, a few questions are bound to pop up. Think of this as your troubleshooting guide—quick fixes and expert tips for those moments when you're elbow-deep in flour and wondering what to do next.
What’s the Deal with Pizza Flour?
For that classic, chewy-yet-crisp crust you get in a real pizzeria, ‘Tipo 00’ flour from Italy is non-negotiable. It’s milled incredibly fine, and its protein content is just right for creating a dough that’s strong enough to be stretched super thin without falling apart. This is the secret to a successful hand toss. You can get your hands on authentic ‘Tipo 00’ flour from specialty shops like IFM Gourmet.
Choosing the right flour isn’t just ticking off an ingredient list; it’s laying the groundwork for your pizza's entire personality. Switching to 'Tipo 00' is probably the single most important change you can make to get professional results at home.
Help! My Dough Keeps Tearing When I Toss It.
Ah, the dreaded dough tear. This almost always comes down to one of two culprits: you either didn't knead it enough, or you didn't let it rest long enough.
Kneading is what builds up the gluten network, giving your dough that beautiful elasticity. If that network is weak, it'll rip. On the other hand, if the dough is too cold or you try to shape it right after handling it, the gluten is too tense and needs to relax. Just let it sit at room temperature for another 20-30 minutes before trying again. You'll be surprised at the difference.
Can I Still Make a Great Pizza Without a Stone?
You absolutely can. While a pizza stone or steel is the gold standard for a crispy base, you can get a fantastic result with a simple hack. Grab your heaviest baking sheet, flip it upside down, and slide it into the oven while it preheats to its highest temperature.
When you’re ready to bake, launch your pizza directly onto that searing hot surface. This intense, immediate heat helps cook the bottom fast, giving you a much crispier crust than you'd ever get by putting it on a cold pan.
Ready to turn your kitchen into the best pizzeria in town? Visit the IFM Gourmet Food Store and browse our hand-picked selection of premium Italian flours, authentic San Marzano tomatoes, and all the gourmet toppings you need, delivered straight to your home in Dubai.

Comments